
We would like to start with a graphic displaying a systematic method to create universes in the new tool.
 Figure 1: Universe Creation Flowchart for the Information Design Tool
There are a few new terms that may jump out as you are reading this, but in case you have not noticed them, let's take a minute to list those terms out:
- Connection – define how a universe connects to a relational or OLAP database. Local connections are stored as .CNX files, and secure connections are stored as .CNS files.
- Data Foundation – a schema that defines the relevant tables and joins from one or more relational databases. The designer enhances the data foundation with contexts, prompts, calculated columns, and other SQL definitions. The data foundation becomes the basis of one or more business layers.
- Business Layer – the universe under construction, and when the business layer is complete, it is compiled with the connections or connection shortcuts and data foundation, published, and deployed as a universe.
- Universe – the compiled file that includes all resources used in the definition of the metadata objects built in the design of the business layer.
Each of the items above refers to a resource that can be stored in a Project when developing in the Information Design Tool. A project is a named local workspace that contains one or more resources used to build universes. Projects can be shared so that multiple designers are able to work on the same resources.
Step 1: Open the Information Design Tool. The new interface screen will be displayed.
NOTE – All created resources will be labeled as "TestProject[resourceType]", i.e. "TestProjectConn" for Test Project Connection.

Figure 2: New Interface Screen
Step 2: Create a new Project by clicking on File->New->Project.

Figure 3: Create Project Option
A local project must exist to assign resources; otherwise an error message will be given.

Figure 4: Sample Error if no local project exists

Figure 5: New Local Project Created
Step 3: Create a new Connection. Right-click on the project you just created, or use "File->New" and choose the Relational Connection or OLAP Connection.
For the purpose of this entry, we will be creating a Relational Connection.

Figure 7: Define a name for Connection
Step 4: Select the proper Database Middleware driver and configure the connection. The tool comes equipped with several DB driver connections with a default installation.
Note – You must have proper privilege to the schema you are accessing. Also, an ODBC or OLE DB connection must already be established to function properly.

Figure 8: Choose the Middleware Driver

Figure 9: Connection Configuration 1

Figure 10: Connection Configuration 2

Figure 11: Connection Configuration 3

Figure 12: New Local Connection Created
A new connection should now be present and expanded in the project. This connection remains local to the project. Connections to be used in published universes will need to be published to the repository and saved as secure connections.
Step 5: Publish the connection to the repository as a secure connection. Right-click on the new local connection, or highlight the connection and choose the "File->Publish->Publish Connection to a Repository" option.

Figure 13: Publish the Connection to a Repository

Figure 14: Secure Connection Shortcut Established
Step 6: Create a new Data Foundation and configure the Data Foundation. Right-click on the project you created, or use the "File->New->Data Foundation" option.

Figure 15: Data Foundation Configuration 1
Note – there are two types of data foundations: Single-Source and Multisource-Enabled.
Single-Source
- Support a single connection.
- The connection can be local or secured, which means you can publish universes based on the data foundation either locally or to a repository.
- Recommended for the following situations: you want to work exclusively with database-specific SQL syntax, or you want to publish the universe locally and work outside of a repository.
- Support one or more connections.
- You can add connections when you create the data foundation and anytime later.
- Multisource-enabled data foundations only support secured connections, and universes based on this type of data foundation can only be published to a repository.
- Required for the following situations: you want to insert tables and joins from more than one relational data source, you want to insert tables and joins from more than one relational data source, or you want to use SQL-92 syntax and SAP BusinessObjects SQL functions.

Figure 16: Data Foundation Configuration 2
Step 7: Select the Connection to associate to the Data Foundation.

Figure 17: Data Foundation Configuration 3

Figure 18: Data Foundation Created
Step 8: Choose the Tables to Insert. You also have an option to insert Derived Tables and Views as well.
Note – Joins to objects in the Data Foundation can either be detected or manually inserted.

Figure 19: Insert Tables for Data Foundation 1

Figure 20: Insert Tables for Data Foundation 2

Figure 21: Data Foundation Created
Step 9: Create a Business Layer. Right-click on the project you created, or use the "File->New" and choose the Relational Business Layer or OLAP Business Layer. The type of business layer depends upon the connection that you used for the Data Foundation.

Figure 22: Business Layer Configuration 1
Step 10: Select the Data Foundation that you would like to use as the basis for the business layer. The tool also provides the option to automatically create classes and objects based on the Data Foundation Layer.

Figure 23: Business Layer Configuration 2

Figure 24: Business Layer Created
Step 11: Publish the Universe to the Repository. Right-click the Business Layer and choose the "Publish->To a Repository" option. This will save the Universe as a .UNX file.
Note – Ensure the Connection for the corresponding Data Foundation is a Secure Connection.

Figure 25: Publish Universe 1
Step 12: Execute a Universe Integrity Check and ensure critical errors are resolved.

Figure 26: Publish Universe 2
Step 13: Choose the Repository Folder to store the Universe.

Figure 27: Publish Universe 3
After clicking the "Finish" button, the Universe is successfully published and ready for use by the users.
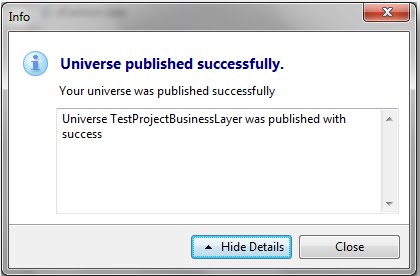
Figure 28: Universe Published
You can verify that the Universe is available by logging into Interactive Analysis and creating a new document.

Figure 29: Universe Available for use in Interactive Analysis
This concludes the guide to create a Universe using the Information Design Tool. As you can see, some new terminology has been added along with a different approach to create an entire universe. We feel that the new layout and approach is tailored for multiple information designers to work on specific resources. Even though no official statement has been made by SAP BusinessObjects, we believe that the Information Design Tool will become the eventual successor to the Universe Design Tool.
No comments:
Post a Comment